

Build a Tunnel Portal
Here is an easy brief tutorial for making a tunnel portal using Brickyard Brick Papers.
Save Money! Add realism!
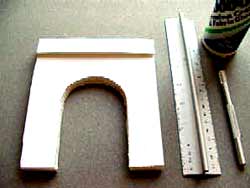
Cut some foamcore board,chipboard, or cardboard into an arch shape. To make the curve, either use a compass or a small can. Our HO tunnel is 6.2 inches high, 5.6 inches wide and has a 4.2 inch tall and 2.65 inch wide opening. We glued up foam to .5 inch thick. You will notice we added a top layer of foam board above the opening to make a raised ridge on the finished model. At the top (with the extra layer) it is .65 inches thick. For Gluing, we like either Aleene's Tacky Glue or "Sobo" they are both good quality general purpose glue with a durable bond.

Print out a sheet of Brick Paper or Random Stone Paper or Cut Stone Paper from Brickyard. Scale up the stone if you want to use slightly large stone by simply typing in a ratio slightly larger than your actual scale. We recommend Using Matte photo paper (do not use gloss photo paper!)for the best image quality, and most realistic appearance. To wrap around the top ridge, print your brick or stone pattern onto thinner paper or print Stone from Brickyard onto our Decal Paper to get a nice smooth wrap around the edges.
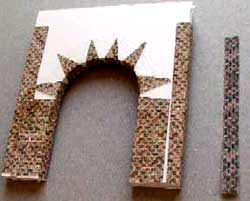
Glue the brick paper or stone paper onto your blank. When the brick paper has dried, cut the paper diagonally in the arch opening and wrap the scraps to the back of the opening.
Now we are going to detail the arch.
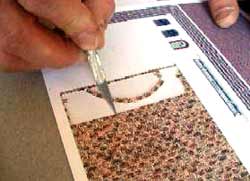
Cut out one course of your stone paper and make very small cuts between each stone from the top of the row going part way down.
This way you can get the stone to curve around the opening without separating each stone. While this step is not necessary, it really gives a more finished look to your structure.
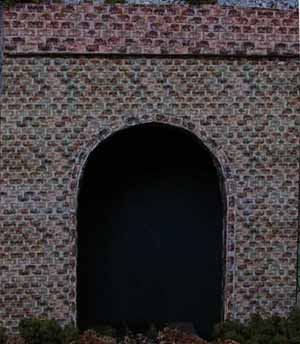
Here we are ready to install the great looking tunnel!
You can add the tunnel just as is, or add a brick paper or stone paper retaining wall to your hillside.